Scanning electron microscopy
Tescan Mira 3
Acquired 2014
How-tos
-
Access the bigdata server
Description
Avoid the use of USB sticks and external HD (they are usually a liability as they can import viruses). Better, faster and more reliable is to copy your data directly to the UniFr server (Personal Exchange folder, Group folder, Bigdata, personal folder)
Remedy
Map the required network drive
Time requirement
About 30 seconds
Difficulty
Easy
Protocol
Map the BigData network
- A the bottom left of your screen, in the Search box, Type ‘This PC‘.
- The start menu opens. In the options on the right, click ‘Map network drive‘.

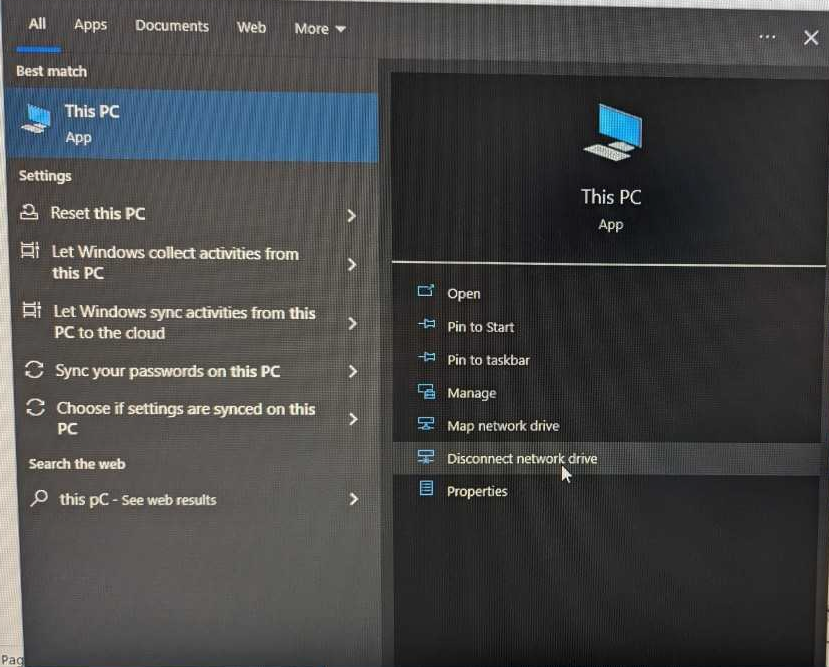
The map network drive utility opens.
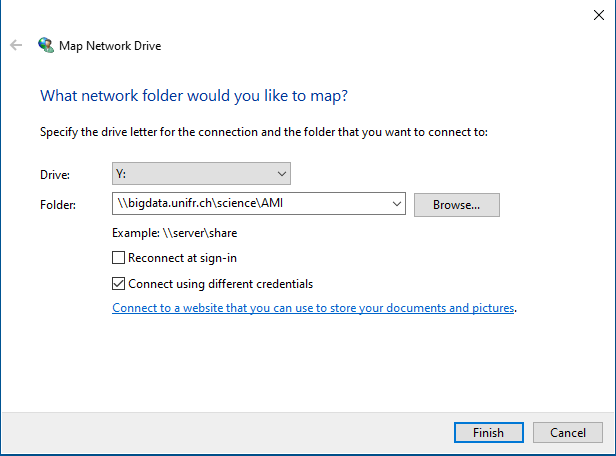
Drive Y: (leave unchanged) Folder \\bigdata.unifr.ch\science\$DEPARTMENT Uncheck Reconnect at sign-in Check Connect using different credentials
Fill in the variable $DEPARTMENT according to the affiliation list below$DEPARTMENT
Department Folder AMI AMI Biology Biol Chemistry Chem Physics Physics Medcine Med Geosciences Geoscience Example of a folder for an AMI user:
\\bigdata.unifr.ch\science\AMI
Click ‘Finish’
Enter your credentials
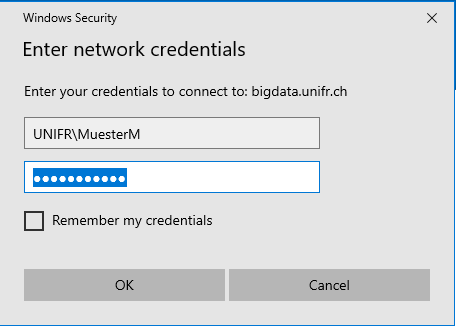
Next, a dialog box will pop-up, asking for your credentials.
- Username: UNIFR\your Unifr username. See an example below. Do not forget the UNIFR\ before your username!
- Password: your UniFr password
- Do not check “remember my credentials”
Click OK
System is connecting to BigData
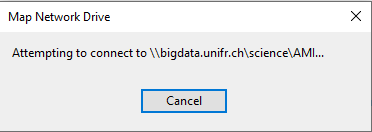
This should not take longer than a few seconds
Disconnecting your BigData drive
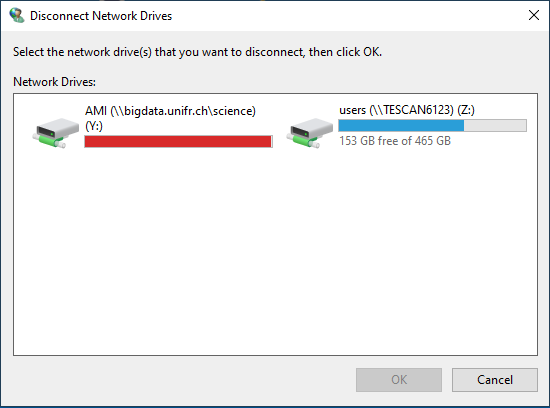
Do not forget to disconnect after use:
- Start menu > type ‘This PC’
- Select Disconnect network drive
- A new window pops up. Select Y: (the bigdata drive)
- DO NOT DISCONNECT \\TESCAN6123 (communication with the SEM)
Click OK
-
The maggot screws / assessing the stage
Description
Maggot screws are the small screws that fix the sample into the stage.
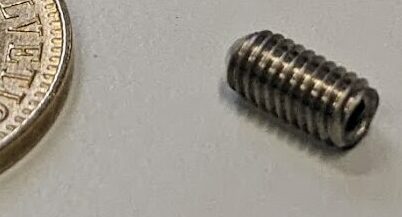
If such screw falls into the mechanism of the stage, it can damage the stage.
Remedy
Tighten the screw after usage. Tighten any loose screws.
Time requirement
Few seconds
Difficulty
Easy
Protocol
Before your session
- With the chamber open
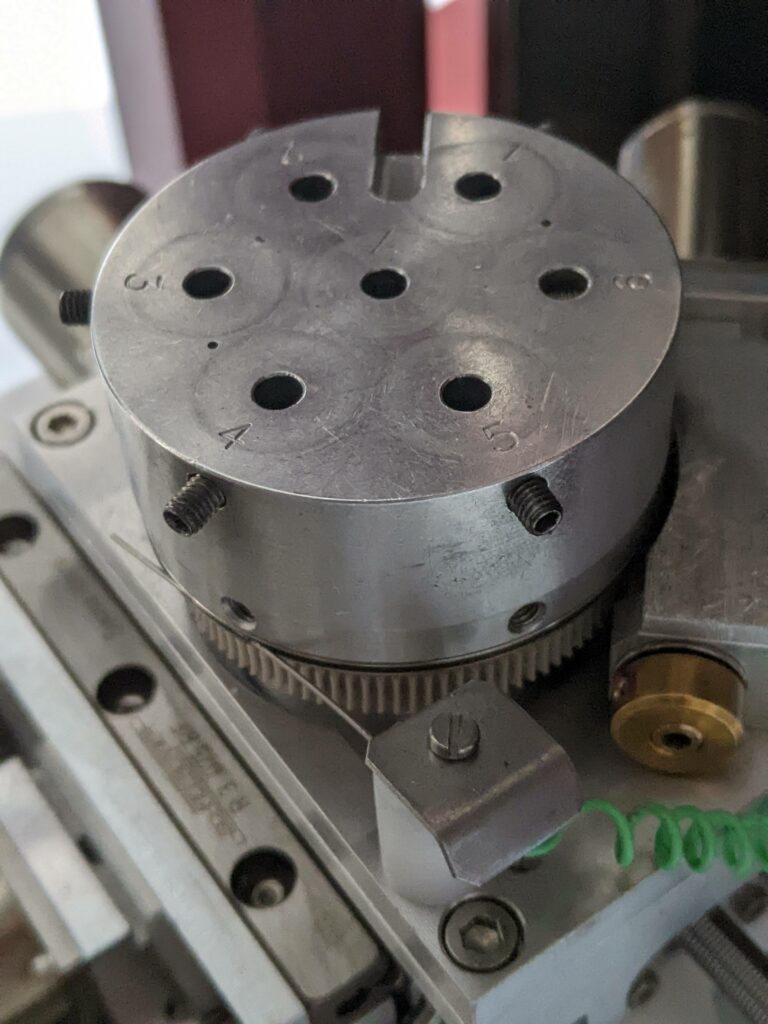
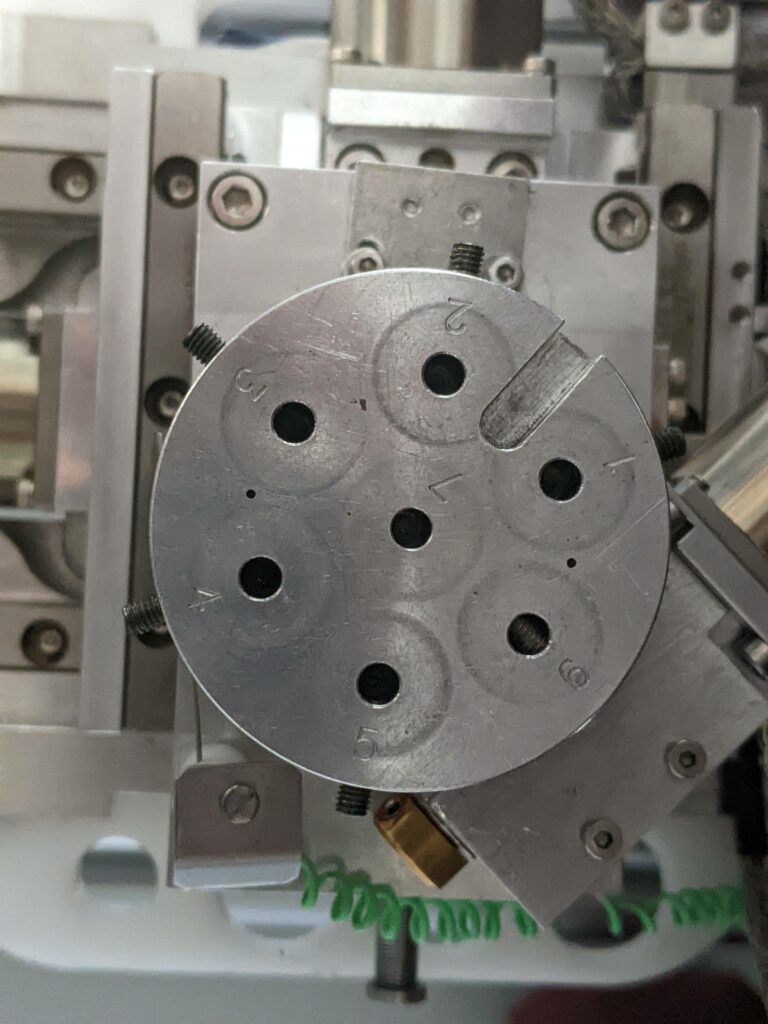
Check for all maggot screws. Maggot screws sticking out in positions 4 and 5 (left) and in positions 1, 2, 3, 4 and 5 (right). The vibrations of the motors will further loosen the screws until they fall out.
- Use the Allen key to tighten the loose screws
- Tighten them to a similar extend as you do when you fix a sample: until you feel a resistance, but do not put extensive force on the little screws.
After your session
- After you took out your samples, assure all maggot screws are nicely tightened
-
Extract data from .EMSA files (EDX data)
EDX spectra are typically saves as .EMSA files, a text file containing the metadata and the data points of your spectrum. this R script extracts the data points automatically (Courtesy J. Duruz).
Note: this is an R script. You need to run it in R.
Troubleshooting
-
I see a windows Login screen. How do I proceed?
Description
When arriving at the SEM, you do not find the standard Mira 3 login screen but a windows Login. You can either see the screen where you can choose between users (Tescan logged on or an account involved in EDX connection)
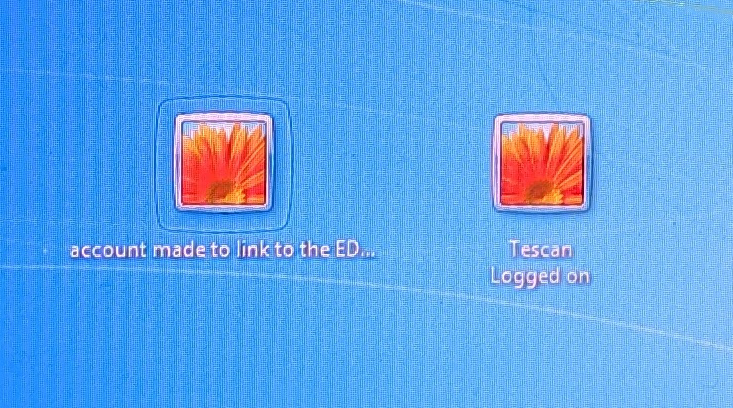
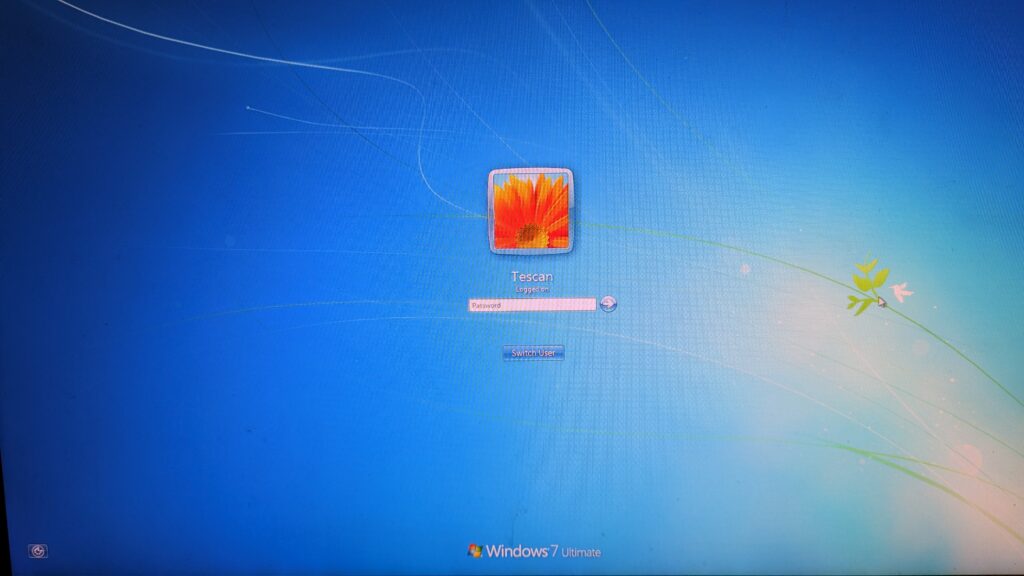
Remedy
Login
Time requirement
About 10 seconds
Difficulty
Easy
Protocol
If necessary, choose the “Tescan logged on” account
- Username: Tescan
- Password: tescan
(note the use of the capital T in the username but not in the password)
After login, check if the Mira3 software is running:
- You see the Mira 3 login screen
- It is minimized in the taskbar. Look for this icon and click it

- If no such icon is in the taskbar, then start the MiraTC software from the desktop

-
Correct Stage Position: Z vs WD & Z
Description
The correct setting for WD & Z after calibration of the stage is 30 mm. The correct setting for Z after calbibration is 40 mm.
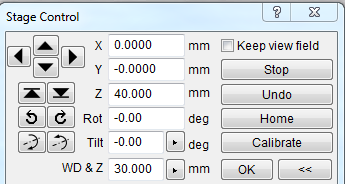
If this is not the case at the beginning of your session, please correct this according to the algorithm below. The Z value and WD&Z value will be affected when you raise the stage towards the lens during your session.
Remedy
Manual stage calibration
Time requirement
About 1 minute
Difficulty
Easy, but you can potentially severely damage the system! Be cautious.
Protocol
Manual stage calibration
STEP 1: Z is not 40 mm
- The Z value should never be actively changed. If Z is not 40 mm at the start of your session:
- Press Calibrate
- This results in Z=40mm. WD&Z can still be different from 30mm. See below
STEP 2: Z=40mm, but WD&Z < 30 mm
- Select the value in WD&Z and type in 30. This changes WD&Z to 30, but Z will increase equally.
- Wait for the stage to finish its movement.
- Press Calibrate
STEP 3:
Z=40mm, but WD&Z > 30 mm and < 40mm
- Proceed carefully!
- Calculate the difference between the WD&Z value and 30. For example, if WD&Z is 38.750mm, then the difference is 8.750.
- Add this to the Z value (in this example: Z is changed to 48.750).
- Press enter and wait for the stage to finish its movement. This is the only time you are allowed to actively change Z!
- Press Home.
STEP 4: Z=40mm, but WD&Z > 40 mm
- The maximum range of the stage is 50 mm. If WD&Z > 40 mm, you will need to run the above process iteratively. For example WD&Z=45.
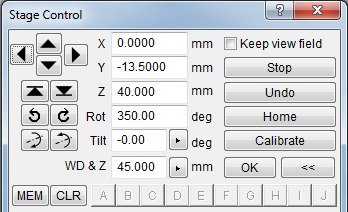
- First step: Change Z=50, press enter.
- Wait for the stage to finish its movement.
- Then: press Home. The result is a WD&Z=35 and a Z=40:
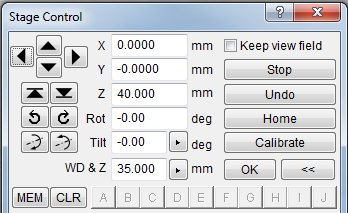
- Second step: lower Z: add 5 to to setting of 40 mm to reach 45 mm (because WD&Z is 5 above the intended 30 mm).
- Press enter.
- Wait for the stage to finish its movement.
- Then press Home
-
The Self test throws an error: No answer from vacuum unit
Description
After login, a self test is being performed. Occationally we witnessed this self test failing at the vacuum unit:
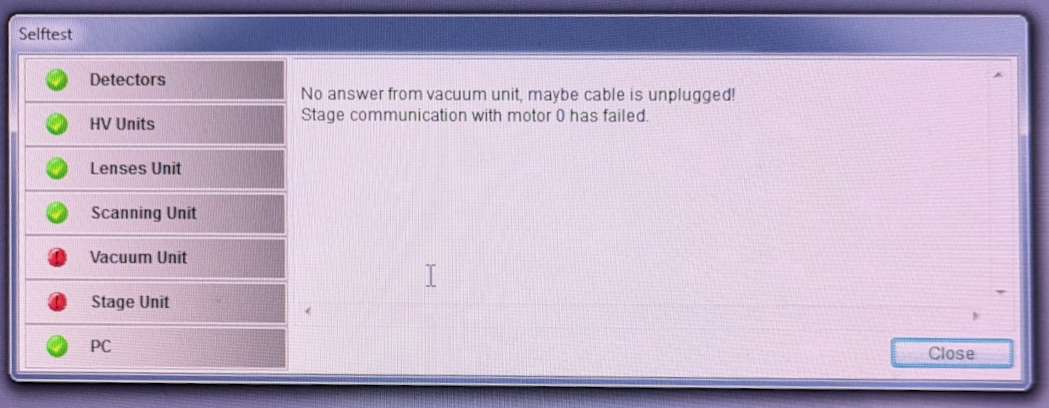
Remedy
restart the Mira software
Time requirement
About 1 minute
Difficulty
Easy
Protocol
- Logout of the Mira workspace
- Once you see the Mira login / opening screen, close the software by clicking the red X at the top right
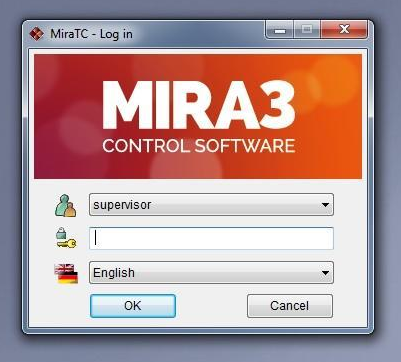
- Wait 5 seconds
- Start the Mira software by doubleclicking the icon on the desktop

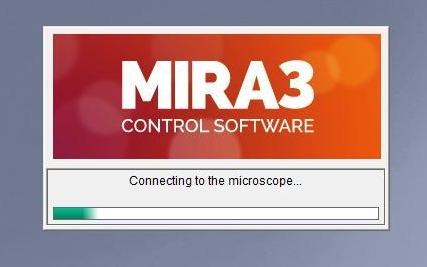
- The startup will take about 30 seconds:
- login as you do normally
-
Stage rotation misalignment
Description
The position of that stage (1-7) is not matching the actual position in the chamber.
Remedy
Stage calibration
Time requirement
About 1 minute
Difficulty
Easy
Protocol
Stage calibration
- In the stage calibration window, below “Home”, find the calibration button
- Click the Calibration button
- In the chamber view, you can follow the stage going to its point of origin (lowest X, Y and Z) and make a complete stage rotation.
- Now the alignment is correct again.
-
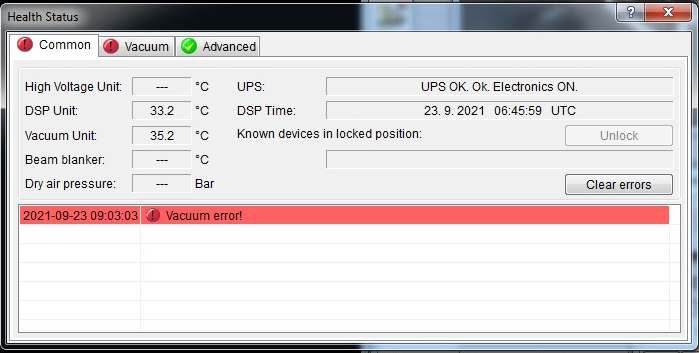
RTP pump error
Description
The software throws an error during pumping: RTP pump error. The pump stops pumping.

Remedy
Click “pump” again
Time requirement
seconds
Difficulty
Easy
Protocol
- If this happens once, just click pump again. The issue is due to an overeager temperature sensor in the pump.
- If clicking “pump” does not remedy the situation and again throws the same error again and again, there is more at hand. In this case stop your session and inform the admin immediately through OpenIris.
-
Cannot focus at low HV (< 4 kV)
Description
Focussing and in particular beam centering is not possible at low HV, usually less than 4 kV.
Remedy
Load the default configuration
Time requirement
About 1 minute
Difficulty
Easy
Protocol
Load the default configuration
- In the top menu click Options > Configurations > Load
- Move to the folder “C:\Tescan\Mira\”
- In this folder, find the folder “Configurations”
- Choose “defaultOriginal.cfg” (of 05.06.2018)
Adjust the default to low HV
The system will reload the configuration, changing HV to 20 kV and beam intensity to 10.
- Set the HV to a low values (e.g. 2 kV)
- Set the beam intensity to 7
- zoom out and redo the beam centering
- focus and stigmation might be quite off. Repeat them as well.
Brand
Tescan Mira3 LM FE | acquired 2014
Emittor
Field-emission Schottky emitter | High voltage: 0.5-30 kV
Detectors
- Everhart-Thornley type Secondary electron detector
- Retractable BSE detector with high sensitivity
- In-Beam SE Detector
- Energy-dispersive X-ray spectroscopy (EDX) detector, Peltier-cooled.
Technical
- Live stereoscopic imaging using 3D Beam Technology
- Full 5-axis motorized compucentric stage.Computized stage