Create and Manage my ORCiD
If you are new to ORCID and haven't got an ORCID account, register on https://orcid.org/register, it takes one minute and is free.
Delegate account
You can delegate the management of your profile to another person, designated as a trusted individual. This person must be registered with ORCID. The designated trusted person will be able to update all sections of your profile. If you want to delegate go to “Trusted parties” section on the top right of the page under your name, scroll down to the section “Trusted individuals” and find the person's account by entering their name, email or ORCID iD. You can also revoke a delegation at any time.
Import your works

Works is the way ORCiD calls your research output: publications, data sets, conference presentations, patents, videos, web content, etc. Allowing trusted organizations to add information to your record ensures the data connected with your ORCID iD is trustworthy, as well as saving you time entering information manually, remember: enter once, reuse often.
Watch this short video about how to add works to your ORCID record using the Search & Link Wizard. This is the most recommended process as it enables a reliable connection between your ORCID iD and your works.
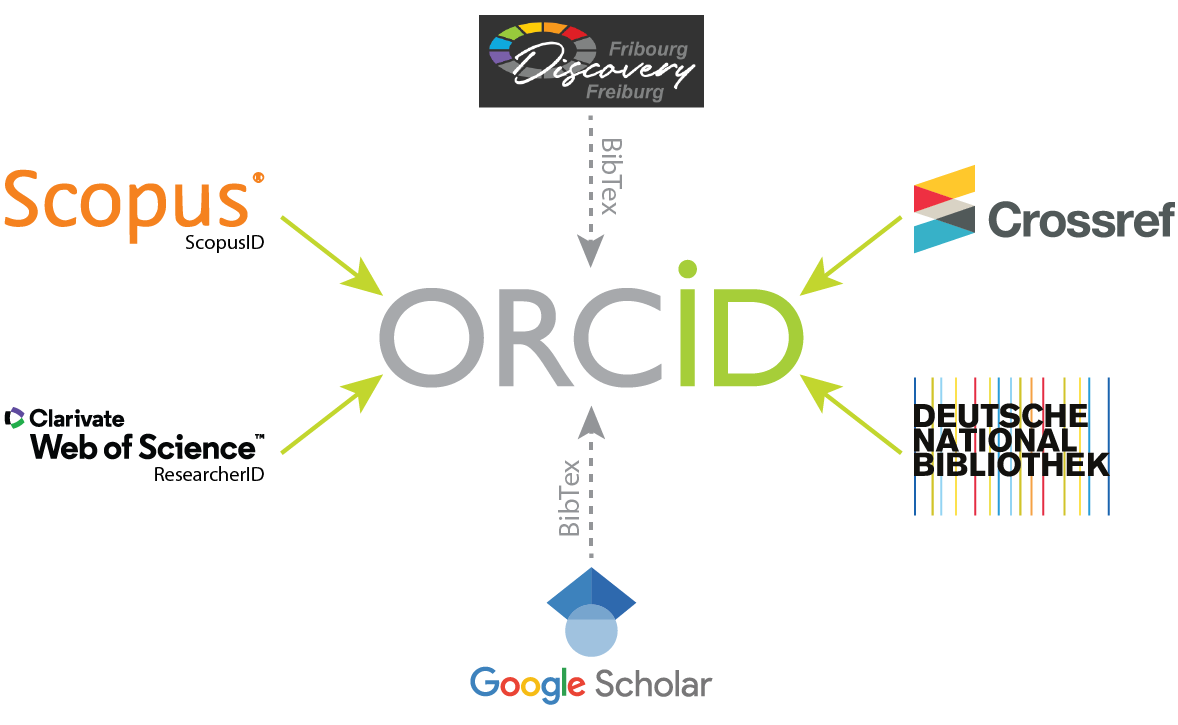
Other databases allow direct linking with ORCiD for an automatic synchronization. The Web of Science (WoS) and Scopus are the two better known scientific bibliographic catalogues. Find below basic instructions on how to claim your IDs and import your works into ORCiD from the main databases. More detailed information can be found in the Manual for ORCiD and in the FAQ section.
-
Web of Science (ResearcherID)
The University of Fribourg provides access to the Web of Science (Wos). Claim your profile by running an author search under your name, and clicking on “Claim my record”. After successfully creating your user profile you will be assigned a ResearcherID that you can link with ORCiD with the following procedure:
Click on username > Profile Settings > ORCID Syncing > Permissions > scroll down and click on Grant Permission
After that you can export your publications to ORCiD.
-
Scopus
Users from the University Fribourg can only access the Scopus Preview version of this database. However, they can still claim their author profile and link their ScopusID with ORCiD.
-
Bibtex from Google Scholar, BCU and other databases
If the previous processes do not allow to include the complete production of a researcher, there is still the possibility to import through BibTex files (.bib). Many databases, like Google Scholar or the Biblioteque Cantonal de Fribourg, do not have a direct link with ORCiD, however, they allow to export references in “.bib” format that can later be imported in ORCiD.
In the case of Google Scholar, from your profile page select the articles you would like to export - or check the box next to the "Title" column header to select all articles in your profile - and click the "Export" button. Follow the prompts to download a BibTeX.
Then, in ORCiD you can import your works following the sequence:
Works -> Add Works -> Add BibTex -> Choose BibTex File
The publications appear in a list. Select save (“disk” icon) or delete ("trash can" icon) to add or delete the work individually, or “save all” to add all of the publications at once. Don’t forget to set the visibility to Everyone or Trusted Parties if you want that the works are features in the SIR.
Remember this is a last resource method, since the quality and completeness of the bibliographic entries cannot be guaranteed.
-
Add works manually
ORCiD strongly recommends to add use the functions of the Search & Link Wizard or the automatic export functions already explained, however if the works can not be found in any database you can Add works manually to complete your ORCiD record.

